Friday, February 14, 2014

Homegrown Oats - Harvesting and Dehusking Grain


 Last summer marked my first year growing grains for an edible crop. I came across a variety of Irish oat seeds called 'Sonas,' and thought I'd give it a whirl! Being a Baker by trade, I'm very intrigued to the growing, harvesting and processing needed to get grains from the soil all the way to flour. With little research I made a small border 4ft long to grow them, and away they grew. Very satisfying to watch, as oats are one of the easiest grains to grow. I had my own notions of homegrown porridge in the year to come.

It's worth noting here when growing oats for grain in your backyard, to purchase a 'hulless' variety. Traditional oat grains have two barriers of covering; the outer husk and a hull coating the grain. The husk is easily removed from the oats, and with a 'hulless' variety that is all that is needed. The 'Sonas' oat does happen to have an inner hull. Which requires cracking and winnowing further, this is hard to achieve without a grain mill. 

I have yet to buy a grain mill, so no porridge for me! I am in the market for one, and the grains will keep till it arrives. I have in-the-mean time just recieved a package full of new grains from, Brown Envelope Seeds, including: Hulless Oats! (the oat saga continues...) I will be devoting 1/3 of my potager to grains this year. Among the oats I'm also experimenting with sweetcorn, flint corn, quinoa, wheat and rye grains.


Freshly harvested 'Sonas' oats     


After weeks of curing the oats are ready to be 'thrashed'

Pulling the grains from the stems seemed to be the most effecient way of removing grains.

Ready to bake and seperate the Chaff (seed heads/husks) from the grain.
Winnowing the husks on a windy day
Rubbing the grains helped free the husks a bit better
Dehusked. Ready for cracking and winnowing a final time. 
When growing oats you will find the time to harvest, when pressing the oat grains they are hard and no milky liquid seeps out. To harvest, simply cut the base of the oat stalks and bunch the stems together. The oats will need curing to dry out further, it's best to do this by leaving them up right for a good few weeks, I waited months until I got around to it! Once cured you can begin thrashing and dehusking the grains

The following procedure works for both hulless and hulled varieties of oats. As I mentioned you will have to process the hulled varieties further, to get to your whole oat groats.
____________________________________________________________________
Dehusking Oat Grains

  • Using a large receptacle, (rubbish bins work well) hit the side of the container forcefully with the oat stems. The oats should seperate from their stalks.
  • If you find the grains are being stubborn, as I did,  you can pull them off by hand.
  • Once removed pour the oats on to baking trays, bake for 1 hour at 80C (180F). 
  • The husks will become wispy and dry. Let cool and rubb the grains by hand, to help seperate the grains.
  • On a windy day go out doors and pour the grains with their husks onto a seperate tray. 
  • The husks will float away in the breeze leaving you with happy little oat groats or, if you grew the hulled variety like me, oat groats in their hull jackets. (pictured above)

Thursday, August 29, 2013

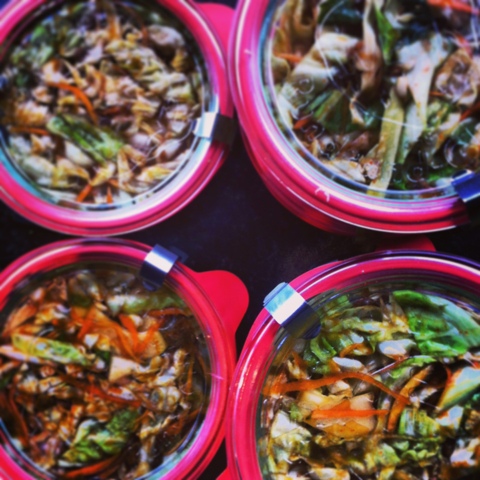
Quick Kimchi

 
I planted cabbage in the patch last September to over winter for spring. It seemed like a good idea to have something in the ground as a winter crop. All true except for the fact, I never cook with cabbage! especially white cabbages. sometimes i'll make bacon and cabbage, but not 10 plants worth, which is what i have growing. I decided the best use would be a load of kimchi, and I was right!

my over wintered cabbage plants took awhile to produce heads after the long winter we had in Ireland.


I love kimchi and its quite hard to get in Ireland. Kimchi is the spicy Korean equivalent to sauerkraut. which is a fermented cabbage condiment. this recipe is for a quick 'white person' version, as opposed to the one that ferments for weeks (sometimes months!) as is the standard with authentic kimchi. a Korean friend of mine told me his Nan (grandmother) would put hers in a clay pot underground for 6 months during the winter! now, that must be a pungent mixture!


chill powder, ginger, green garlic and anchovies
don't let that scare you, with this recipe you'll have tasty kimchi in 2 days. the flavour develops nicely over the next couple of weeks so you have time to eat all of it. try keeping some around and tasting it as time passes.


if you are feeling creative try mixing different thinly cut veggies into the kimchi, as anything goes with this mix. beetroot would be interesting as well as some kale. I used green garlic stems, as my garlic wasn't quite ready for digging up, and im really happy with the results. I've been eating it with beef burgers (see the FWDR Instagram feed) and teriyaki mayo. its amazing with fish and chicken too. I even had it with scrambled eggs for breakfast, shoved into a pita - its the perfect kick start to the morning!

 
_________________________________________________________

Quick Kimchi

Makes nearly 1.5 litres (6 cups)

Recipe adapted from What I had growing in the veg patch, The Simple Things Magazine and Wild Fermentation by Sandor Elix Katz (see Bookshelf)

this is a two day affair, but the kimchi gets better with age so you can keep it in the fridge for weeks after preparing. serve kimchi with a Korean BBQ, roast chicken, grilled fish, breakfast, lunch or dinner. its especially good on a burger with a bit of soya sauce mixed into you favourite mayonnaise. VERY more-ish.

2 pounds (900g) white cabbage, finely sliced into ribbons
2 tablespoons sea salt
2 tablespoons sugar
2 whole stalks of green garlic, or 10 cloves of fresh garlic, finely chopped
20 slices of fresh ginger, peeled and finely chopped
3 tablespoons chilli powder
1 small tin anchovy fillets in oil
4 fl oz (100ml) soya sauce
1 bunch of spring onions
1/2 pound (225g) carrots, peeled and cut into julienne strips

  • place cabbage salt and sugar in a large container and toss, leave covered in the fridge overnight.
  • the next day, rise the cabbage and dry out thoroughly
  • in a separate bowl add the marinade ingredients - garlic, ginger, chilli powder, anchovy fillets, and soya sauce and mix thoroughly, blending in the anchovy as much as possible.
  • add water to make the marinade the consistency of a thick salad dressing.
  • add the spring onions and carrots to the cabbage
  • stir in the marinade to the veggies.
  • tightly pack the kimchi into sterilized jars or a large container
  • this kimchi is great after 24 hours in the fridge, better after a week and at 2 weeks its in its prime. if you like strong flavours you can keep it around up to a month


Thursday, August 22, 2013

Easy Sponge Cake - with citrus, rosemary and thyme


this week  is the FWDR Blog Birthday week! it's been an whole entire year since the first post 52 weeks ago, and how far we've come. the year has been a good one, with lots of sun (and rain) and great home grown food. when FWDR first posted the Homegrown Bloody Mary post, it was also THE Julia Child's Birthday, and what a day to begin a food blog! So, in honour of Julia and the big birthday, I've taken from Julia's, Baking with Julia Cookbook, a cake recipe I've used time and time again with great results. I tweaked it a little to give it an FWDR spin, by adding lime zest, rosemary and thyme. its a perfect sponge recipe made even better with freshly whipped cream and homemade jam.


I've added a lot of pictures of the sponge making process, as I feel many people are afraid of making sponge cake. it really is easy, though. the one trick is to use a light touch, and not to be scared! the only leavening to this cake is the air you whip into the eggs, so an aggressive hand will knock out vital air and lend to a dense, lifeless cake. this is a traditional French genoise recipe, using the cold technique. don't skimp on whipping time, you need to whip the eggs and sugar until a ribbon sits on top of the mixture for 10 seconds, so beat those eggs for at least 5 minutes.


Monday, August 12, 2013

Roasted Tomatillo Salsa


Phew! Finally found a scrap of time to pull this post together. The computer is still being fixed, which is the main reason it's taken so long to post. So just The same as my last post, this is all being written on my smartphone. 

The weather has really turned back to an Irish summer, it's grey, warm, wet and the air is quite close. Which are the perfect conditions for blight! That said i just finished pulling up my second early potatoes, called 'records'. They looked great, with no blight at all. All that's left are the main crop 'golden wonder' spuds. Looking forward to them! 


Since its been so dreary out I've been really craving warm summer Mexican cuisine. The first crop of tomatillos were harvested just last week. I knew what was destined for those babies- tomatillo salsa. It's great as a dip for tortilla chips or it makes a fantastic and authentic enchilada sauce, which is where my tomatillos ended up. Baked with cheese and spicy beef filling. 

Tuesday, July 30, 2013

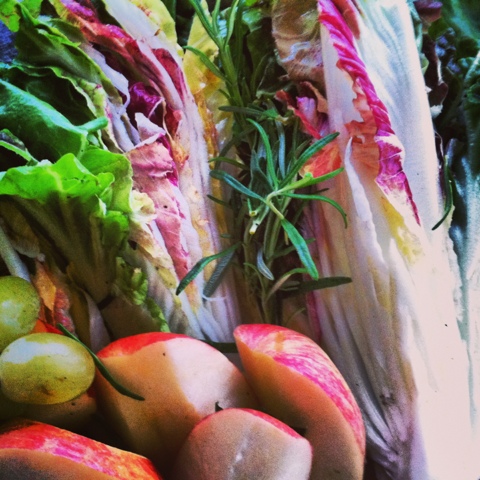
Radicchio Apple and Grapes


It's been an exciting week with daily rain and thunder showers then amazing blazing sunny periods. the veg patch Is loving the weather, im not so sure about it myself. The week was made even more exciting when the video card in our computer died, oops. Could be a few weeks till its back up and running! So this post is being written entirely from my smartphone. Which with the blogger app isn't as bad as I would have imagined. 

The up side is my Radicchio Treviso plants are looking fab, and I've decided to try out a recipe I've earmarked for a time like now when my plants were ready. The recipe is adapted from Around my French Table, by Dorrie Greenspan, (see Bookshelf Page, above) a must have for any enthusiastic chef who loves entertaining with simplistic and delicious food. I love recipes that toy with sweet and savoury ingredients, so this one caught my eye.


Radicchio is part of the endive/chicory family of plants thats flavours range from faintly bitter to intensely bitter. The Bitterness can change during the growing season too, depending on outside temperatures, cooler temperatures aiding in a more mild flavour. The bitterness mellows with cooking as well, adding a bit of cream helps too. This dish is slow cooked with salted butter, sweet grapes and tart apples balance out the bitter tones of the radicchio. One bite is bitter the next sweet and savoury, its a flavour sensation, and a little rosemary undertone sews the whole plate together. Enjoy! 


______________________________
Radicchio, Apple and Grapes
Serves 2 as a main or 4 starters

Making this dish reminds me of cooking a tart tatin, the aromas of the butter caramelising with the apples and grapes are part of the reason. Another is the time involved, patience is key. Everything needs to be soft and melting for this dish to be perfect. 

2 medium heads Radicchio Treviso or 1 large head, halved for medium heads or quartered for large
1 1/2 Gala apples, quartered and cored
3 small clumps of green grapes
3 -4 small sprigs rosemary
2 tablespoons salted butter 

• place a large sauté pan on a low heat , add the butter and let melt. 
• place radicchio in pan cut side down, fill in gaps with apples, grapes and rosemary, leave to bubble away slowly for 20-25 minutes
•check to see if everything is caramelising, if not turn up heat a fraction and wait to turn the fruit and radicchio.
• once browned flip everything over and repeat cooking another 20-25 minutes
• poke the radicchio, apples and grapes to make sure they are soft, check got caramelisation, if ready remove from heat and plate. If not let cook longer adjusting heat if necessary.
• add a small bit of water to the pan to make a scant amount of sauce and spoon over the finished dish
Friday, July 19, 2013

Salads Everyday

French breakfast radishes with greens
here in west cork, we are having the best weather in it seems like a century! you don't even want to think about cooking, its that warm. spain is even cooler than here, global warming? maybe. does it matter? not right now! (i'm half joking there) we seriously haven't had rain in weeks.

despite the lack of rain, one of the great things about this time of year is every time i go to the garden, there's something new to pick and chop up into a salad. which is great for a hot afternoon.
there's cauliflower, courgette, cabbage, kale, peas, beetroot, radishes, spinach, lettuce, onions, chard.... you get what i mean? its a great time to have a garden and this post is a celebration of that fact.

there's no recipe today but there's more posts on the way like: a tangy slaw for tacos, elderflower fizz and cocktails (yes, MORE cocktails!) and a recipe that goes great with crispy calamari. enjoy the photos, there's loads more on the FWDR instagram page.


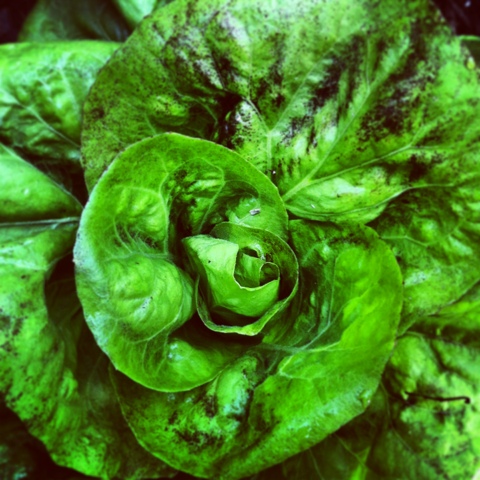
little gems are a great lettuce to grow if the slugs don't get to them first!


smoked mackerel with chard, fennel and flowers